
Table of Contents
Changing brake pads is an essential maintenance task that ensures your vehicle’s braking system remains efficient and safe. In this comprehensive guide, we walk through how to replace your brake pads at home with precision and confidence. Whether you’re a weekend DIYer or an aspiring mechanic, this expert guide is designed to equip you with everything you need to know.
Why Replacing Brake Pads Matters
Brake pads are integral to your car’s braking performance. Over time, they wear down due to friction and need to be replaced to prevent damage to rotors and maintain optimal stopping power.
- Worn brake pads reduce braking efficiency and increase stopping distances.
- Delayed replacement can lead to costly rotor or caliper damage.
- Regular checks every 10,000 to 20,000 miles help maintain safety.
Tools and Materials Needed to Change Brake Pads
Before starting, ensure you have all the necessary tools ready to avoid mid-job delays:
- Floor jack and jack stands
- Lug wrench
- C-clamp or brake piston tool
- Socket set and ratchet
- Brake cleaner
- New brake pads
- Anti-squeal brake grease
- Torque wrench
- Protective gloves and eye gear
Change Your Brake Pads
Step-by-Step Brake Pad Replacement Instructions
1. Park Safely and Loosen Lug Nuts
- Park on a level surface and engage the parking brake.
- Use a lug wrench to slightly loosen the lug nuts while the car is still on the ground.
2. Lift the Vehicle and Remove Wheels
- Place the jack under the manufacturer-recommended lift point and raise the car.
- Secure the vehicle with jack stands.
- Remove the loosened lug nuts and take off the wheel.
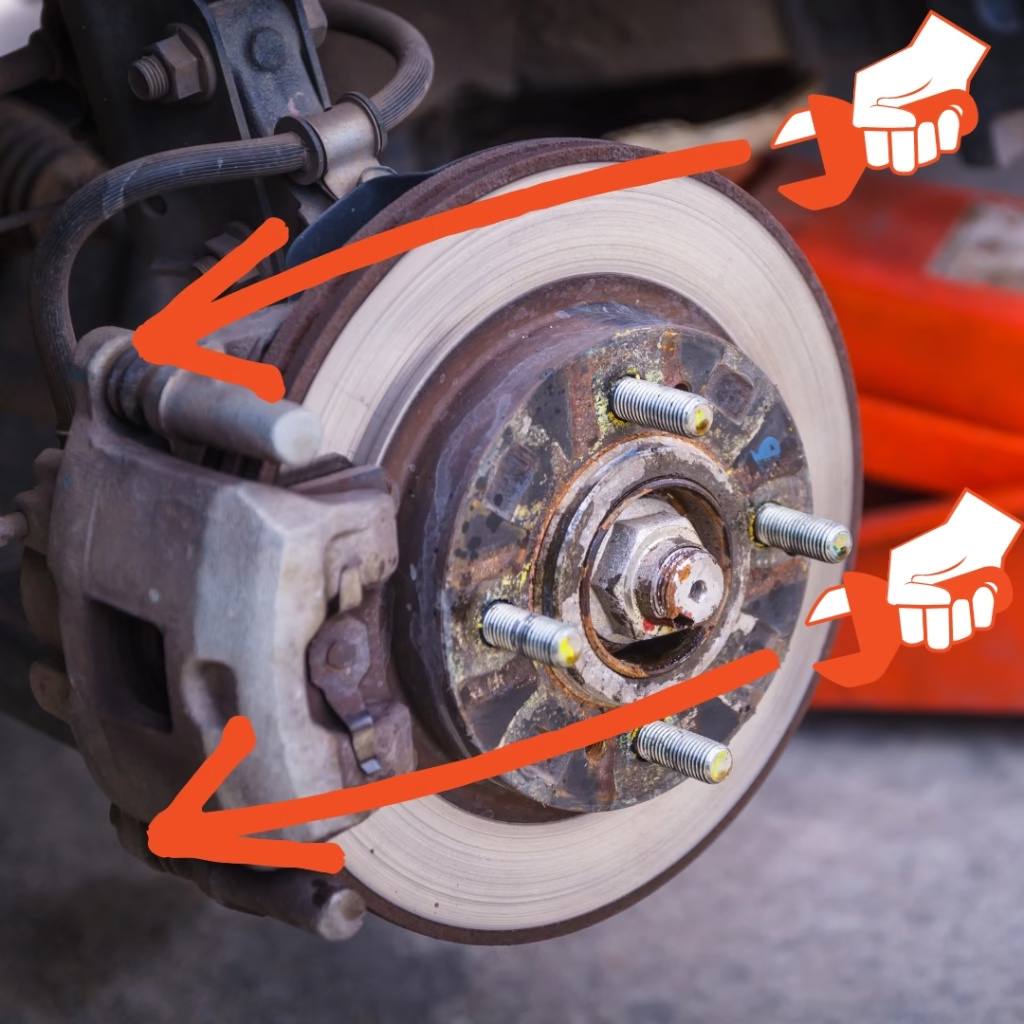
3. Inspect the Brake Assembly
- Locate the brake caliper attached to the rotor.
- Check the condition of the rotor and brake pads.
- Look for uneven wear, cracks, or scoring.
4. Remove the Brake Caliper
- Use a socket wrench to unscrew the caliper bolts.
- Carefully slide the caliper off the rotor.
- Support the caliper with a hanger or rope to avoid straining the brake hose.
5. Remove the Old Brake Pads
- Slide the worn-out brake pads from the caliper bracket.
- Take note of the shim and clip orientation for reinstallation.
6. Compress the Brake Caliper Piston
- Use a C-clamp or a brake piston tool to press the caliper piston back into its housing.
- This step is crucial to make room for the new, thicker brake pads.
7. Install the New Brake Pads
- Apply a thin layer of anti-squeal grease to the back of the new pads.
- Slide the new brake pads into the bracket, aligning with the clips.
8. Reinstall the Caliper
- Carefully slide the caliper over the new pads and onto the bracket.
- Reinsert and tighten the caliper bolts to the manufacturer-specified torque using a torque wrench.
9. Reinstall Wheels and Lower the Vehicle
- Put the wheel back on and hand-tighten the lug nuts.
- Lower the vehicle and torque the lug nuts in a star pattern.
10. Pump the Brake Pedal and Test Drive
- Pump the brake pedal until it feels firm to seat the brake pads properly.
- Perform a short test drive, braking gently to ensure proper installation.
Recommended Brake Pad Replacement Interval
Most manufacturers recommend replacing brake pads every 30,000 to 70,000 miles, depending on:
- Driving habits (frequent braking, aggressive driving)
- Road conditions (hilly terrain, stop-and-go traffic)
- Brake pad material (ceramic, semi-metallic, organic)
Common Signs Your Brake Pads Need Replacement
Knowing when to change your brake pads is critical. Watch for:
- Squeaking or squealing sounds when braking
- Grinding noise, indicating metal-on-metal contact
- Brake warning light on the dashboard
- Reduced responsiveness or increased stopping distance
- Vibration when pressing the brake pedal
Safety Precautions During Brake Maintenance
- Always wear safety goggles and gloves.
- Use jack stands — never rely on a jack alone.
- Work on one wheel at a time to use the other as a reference.
- Keep brake components clean using non-oil-based brake cleaner.
- Never touch the rotor surface with greasy hands.
Choosing the Right Brake Pads
Brake pads vary by material, each suited for different driving needs:
| Type | Best For | Pros | Cons |
|---|---|---|---|
| Ceramic | Daily drivers, smooth stops | Quiet, long lifespan, low dust | More expensive |
| Semi-Metallic | High-performance, heavier vehicles | Excellent stopping power, durable | Noisier, more rotor wear |
| Organic | Light-duty, economy cars | Quiet, soft pedal feel | Short lifespan, more dust |
Final Thoughts
Replacing brake pads is a manageable DIY project that can save money and extend the lifespan of your vehicle’s braking system. By following this detailed guide, you ensure your safety and maintain top-tier performance from your brakes. Perform regular checks and never ignore the signs of brake wear—safe braking starts with you.
Frequently Asked Questions
How long does it take to change brake pads?
Typically, 1 to 2 hours for all four wheels, depending on experience and tools.
Do I need to change the rotors too?
Not always. If rotors are smooth and within thickness specs, reuse is safe. Replace if warped, cracked, or below minimum thickness.
Can I drive with worn brake pads?
Driving with worn pads is dangerous. It leads to rotor damage, reduced braking power, and increases accident risk.


